
How To Build Forms Like a Pro
Whenever I submit a form online, I often run into small UX issues that make the experience less smooth than it could be. Here are all the tips I’ve picked up to create a good form with as little JavaScript as possible. You might find that you don’t need React or any framework at all.
Naive Approach
Here is how a new react developer might create a form
import React, { useState } from 'react';

export function SimpleForm() {
  const [name, setName] = useState('');
  const [age, setAge] = useState(0);

  const SubmitForm = () => {
    // send to server ...
  };

  return (
    <div>
      <div>
        <span>Name</span>
        <input
          type="text"
          value={name}
          onChange={(e) => setName(e.target.value)}
        />
      </div>
      <div>
        <span>Age</span>
        <input
          type="number"
          value={age}
          onChange={(e) => setAge(e.target.value)}
        />
      </div>
      <div>
        <button onClick={SubmitForm}>Submit</button>
      </div>
    </div>
  );
}
This approach works, but it could be so much better.
1. Accessibility
This approach is not accessible to screen readers, As they have no way of knowing that this is a form.
Instead, wrap the form with a <form> tag. A cool feature of the form tag is that it has an onSubmit callback. so now our code looks like this:
import React, { useState } from 'react';

export function SimpleForm() {
  const [name, setName] = useState('');
  const [age, setAge] = useState(0);

  const SubmitForm = (e) => {
    e.preventDefault();
    // send to server ...
  };

  return (
    <form onSubmit={SubmitForm}>
      <div>
        <span>Name</span>
        <input
          type="text"
          value={name}
          onChange={(e) => setName(e.target.value)}
        />
      </div>
      <div>
        <span>Age</span>
        <input
          type="number"
          value={age}
          onChange={(e) => setAge(e.target.value)}
        />
      </div>
      <div>
        <button type="submit">Submit</button>
      </div>
    </form>
  );
}
There are a few things to notice here.
- we added a type=“submit” to our button so it will trigger the onSubmit function
- by default, the form sends the form’s data to the server. to continue handling it on the client we call preventDefault().
Just these small changes already made a massive difference in user experience.
- a mobile user can now easily move to the next form field with their keyboard
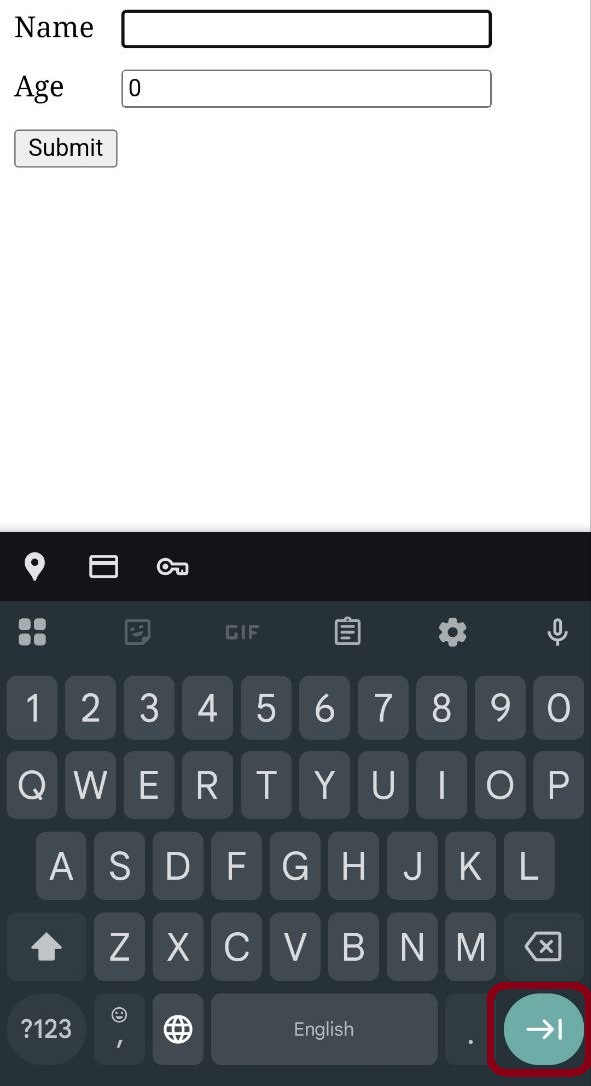
- a mobile user can now easily submit the form with their keyboard when they are on the last form field
- a desktop user can now easily submit the form by pressing enter on the last form field.
2. Proper Labels
Our form is still not the most accessible. In order for screen readers to read aloud the meaning of the form(e.g. name ,age) we need to use the label tag.
The easiest way to do it is like so:
<label>
  Name
  <input type="text" value={name} onChange={(e) => setName(e.target.value)} />
</label>
The browser will automatically associate the label with the input.
Unfortunately this is not supported by older screen readers. So to be as accessible as possible we will do this:
<label htmlFor="name">Name</label>
<input
  id="name"
  type="text"
  value={name}
  onChange={(e) => setName(e.target.value)}
/>
This has the added benefit that I can put the label wherever I want and not just next to the input. It is also easier to style.
We have to link the label with the input’s id. This becomes a problem when we want to reuse our component. If we were to reuse this component we will have 2 inputs with id of “name”.
React 18 has a solution for this called useId hook. It gives us a random string so we can have unique ids for our components.
So now our form looks like this:
import React, { useState, useId } from 'react';

export function SimpleForm() {
  const [name, setName] = useState('');
  const [age, setAge] = useState(0);
  const id = useId();

  const submitForm = (event) => {
    event.preventDefault();
    // send to server ...
  };

  return (
    <form onSubmit={submitForm}>
      <div>
        <label htmlFor={`${id}-name`}>Name</label>
        <input
          id={`${id}-name`}
          type="text"
          value={name}
          onChange={(e) => setName(e.target.value)}
        />
      </div>
      <div>
        <label htmlFor={`${id}-age`}>Age</label>
        <input
          id={`${id}-age`}
          type="number"
          value={age}
          onChange={(e) => setAge(e.target.value)}
        />
      </div>
      <div>
        <button type="submit">Submit</button>
      </div>
    </form>
  );
}
One cool feature labels add is that clicking the label is like clicking the input. This is especially useful with small checkboxes.
A common mistake people make is adding margin to the label. This will make a dead spot between the label and the input where clicking it won’t click on the input.
To fix this, simply use padding instead. This is also a more correct use of the box model.
3. Number input
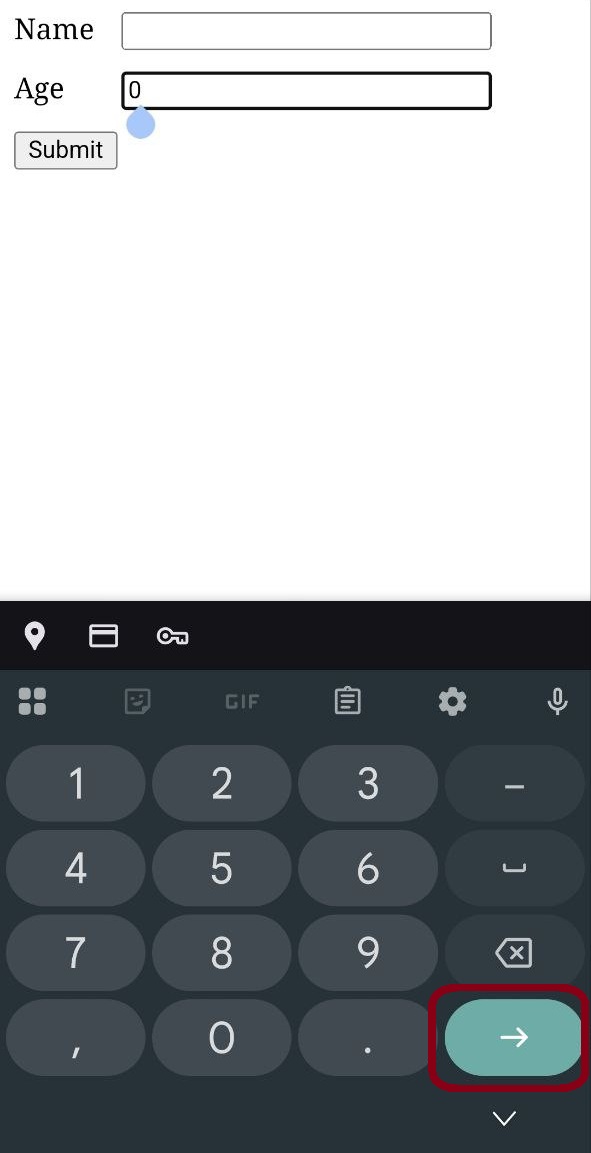
Our age selector uses a number input which is implemented very differently depending on your platform.
On android, the number input will show a numeric keyboard by default.
On IOS, the number input will not show a numeric keyboard, which is not what we want.
To fix IOS behavior we can add inputMode="numeric" to our input.
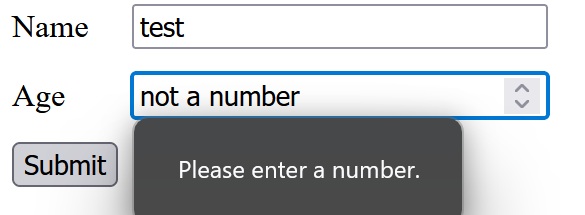
Because we are using a button of type="submit", the user will not be able to click submit if he didn’t input a number and instead see this hint:
Also, chrome only allows the user to type numeric characters and the letter e(this is not a joke, you can check for yourself) while firefox and safari allow any characters to be typed.
to fix this inconsistency we can add a pattern to our input and change the input type to text.
<input
type="text"
value={age}
onChange={(e) => setAge(e.target.value)}
pattern="[0-9]*"
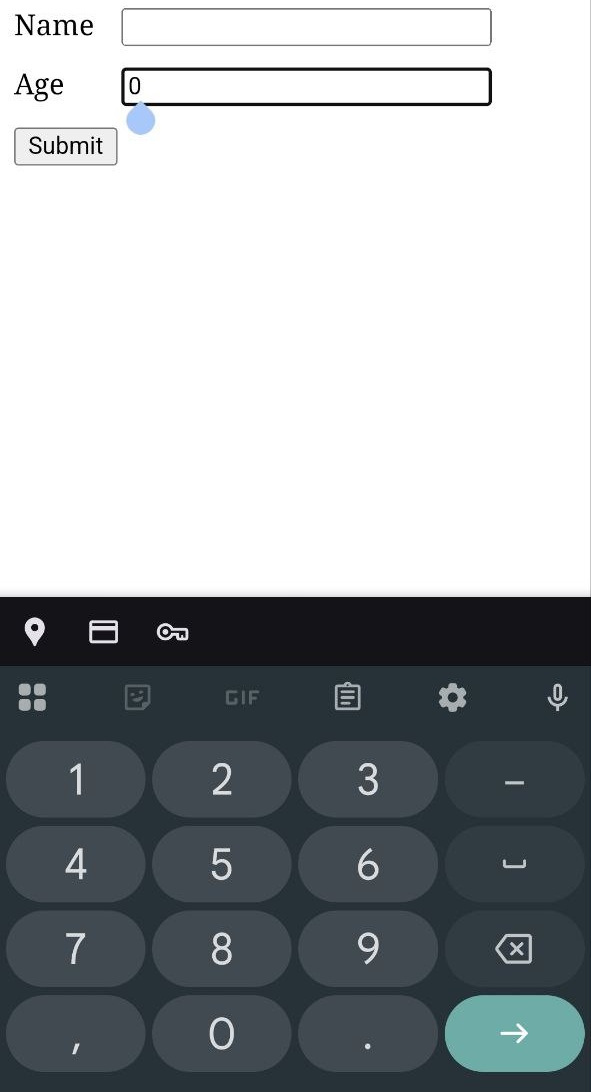
/>Now the user can type whatever they want regardless of their browser, but they will only be able to submit after they change it to a number.
As a bonus, we no longer see those ugly arrow buttons.
And finally, to prevent the user from typing anything other than numbers, you can check it on the onChange event.
so now our form is consistent across all platforms.
Putting it all together looks like this:
<input
  id={`${id}-age`}
  type="text"
  inputMode='numeric'
  pattern='[0-9]+'
  value={age}
  onChange={(e) => {
    if(e.target.value.match(/^[0-9]*$/)) {
      setAge(e.target.value)
    }
  }}
/>
4. No Need for JavaScript
If all we want is a contact form on a simple landing page. We can avoid react which will make everything simpler, faster and more SEO friendly.
Instead we will use a simple HTML form. before JavaScript was invented, forms would send data to the server using a POST request.
<form action="https://your.server.com" method="post">
    ...
</form>
This solution uses 0 JavaScript which makes everything faster and more reliable. But it will do a full page reload once the user submits.
All that is left is to create the backend code to accept the form submission.
Thankfully, this has already been done. A great service called formSubmit will let you create a form endpoint without any backend code.
<form action="https://formsubmit.co/example@gmail.com" method="post">
    ...
</form>
simply change your action endpoint to formsubmit’s server, pass your email address and all form submitions will be sent to your email.
It took me exactly 10 seconds to set up and I never had to worry about it again. Which is the highest complement I can give any SaaS product.
5. Advanced Form Validation
We already have basic form validation in place. like checking if the user entered a number using the pattern property.
But if we wanted to add more advanced validation, we could use a library like react-hook-form to handle complex validation scenarios.
But There are great built in validation features in HTML5 that we can leverage as well.
For example, we can use the required attribute to make a field mandatory.
<input
  id="name"
  type="text"
  required
/>
And if we try to submit the form without filling out the name field, the browser will show a validation error message.
We can even style the error message using the :valid and :invalid pseudo-classes.
input:invalid {
  outline: 2px solid red;
}

input:valid {
  outline: 2px solid green;
}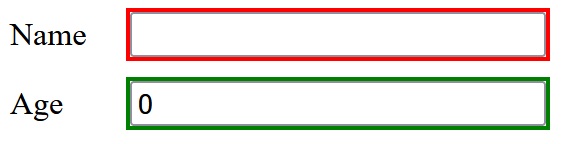
The problem with this approach is that the first thing the user sees is a bunch of red inputs because they haven’t filled out the form yet.
this is where the :user-valid and :user-invalid pseudo-classes come in handy.
input:user-invalid {
  outline: 2px solid red;
}

input:user-valid {
  outline: 2px solid green;
}
Now the validation styling will only be applied after the user has interacted with the input.
Play around with the Form Yourself
Summary
In this article, we explored best practices for building accessible and user-friendly forms.
We saw how feature rich modern browsers are, and how we don’t need that much JavaScript that only slows us down.
Every feature we implemented has great browser support across all platforms.